Friday, May 16, 2014

Divide et impera - How to set up your Automation Framework

Let's look at a basic architecture example that you can use to create your Automation Framework.
If you look at this diagram here, looks fairly simple. But there're some very key things going on here.


The biggest thing that's happening is that your Test Scripts are depending on an Automation Framework and they're not depending directly on Selenium.

We are gonna have our Tests Scripts only depending on our Automation Framework that we are gonna create. And then the Automation Framework is gonna depend on Selenium.

Technically we could swap out the Selenium layer and replace it with a different type of Automation Tool besides Selenium. And just modify the connecting pieces from our Automation Framework and our Tests Scripts should still be able to run.


The goal of our Automation Framework is to support our Tests Scripts. You can also think about what concepts are related to this different layers here:

So, the Tests Scripts are gonna be focused on things like, pages in your applications, workflows. Things that are very domain specific to your application. It's actually going to share the same domain knowledge with your application.

At the Automation Framework layer we are gonna be focused on smaller pieces like the DOM (Document Object Model), things that exist in the browser. This is where we're going to be getting elements from the pages and we're going to be focused on how to manipulate pages and how to best navigate through the application.

Than at the Selenium layer we are at a very low level. It's focused on the actual HTML, the elements. It's parsing the pages. It's using the Browser API. It's at the very lowest level.

The fundamental truth about the framework architecture of automated testing

There's a lot of different ways you can build frameworks for automated testing.
The way that I'm going to suggest is a way that I've found by trying and prove it.
It's a way you can always evolve over time and a lot of people are using similar ways to this one.
This is a fundamental truth about the framework architecture of automated testing.
I highly recommend that you at least follow very closely to this approach .

Let's think about an example of Making Coffee, so you can understand what level of the API we are shooting for our automated testing framework.

This is a very important concept! A lot of people miss this and end up writing fragile tests because of not using a framework.

Everybody knows how to make coffee.
There's a couple of different ways you can make coffee.

The Low Level Approach


1. You get the coffee beans
2. You grind your beans in a grinder
3. You heat up some water
4. You put a filter inside of your cup with the coffee beans you ground before
5. You put some hot water into that filter and then what comes out is coffee

Quite a few steps here, because it's a very low level

The High Level Approach


1. You get a capsule of coffee
2. You insert the capsule into your coffee machine
3. You press a button and what comes out of your machine is coffee

Still a lot of steps here, but definitely fewer steps than the low level approach.

This is actually the level we want to write tests at. And the reason why we want to do this it's because:

  • We want them to be very simple to write.
  • We want them to be very maintainable 
  • We want the framework to handle all the low level details
Because you don't want your tests to be complicated. You want them to be as simple as possible so they are easy to maintain, easy to understand and they don't require programmers to build them.

This is one of the key things that will determine the success of you automation framework.

Thursday, May 15, 2014

Why do we need an Automation Framework?

Why should we create an automation framework?
Why all this work?
Why we just don't record our tests with Selenium IDE? This seems like an easy way to go!
Why do we have to write all this code?

There's a few reasons why recording doesn't work, but the main reason is:


Test Fragility


The major reason is Test Fragility. If we look at this simple diagram we can see that if you decided that you are just gonna record your tests and you won't gonna use some kind of a framework. Than your tests will directly depend on your application.


So what happen now, if you application changes in some way? Let say that the structure of the application changes significantly. Or even just minor little changes.

If you have a large number of tests and all those tests depend on a particular element on a page being named a certain way and that changes. All of those tests are suddenly going to break. And you will have to modify all that code in all those tests. That's really the big disadvantage of recording. Because recording is going to grab the elements by the most efficient way that it can find to grab the element instead of doing it in an abstracted way of grabbing that element. So if the element changes, as those tests break. You are copying a lot of code, when you are recording.


How can we reduce this fragility?


Now let's think about what happens, if we put an Automation Framework in place. The only modification I've made to this diagram was adding an abstraction layer. And that's what the Automation Framework is doing for you. It's primarily giving you an abstraction from the actually application.


The idea here, is that your test now depends on the Automation Framework. You are using the Automation Framework as an internal language for writing your tests. So since your tests depend on that Automation Framework. We run away from that scenario, if something changes in your application now, then you have just to update the method in your Automation Framework that manipulates that object in your application.

So let's imagine an id change, or a name of some field that you are using on an element change. Well hopefully, you've only just created one reference to it in your Automation Framework. You've abstracted the idea of how to grab that element or use that element. And so all those tests are dependent on the framework and so you've only have to change in one place. Because there's not that duplication of the dependencies on your application.

So that's the major reason why we don't want to record.


Testing your web application in parallel with multiple machines againstdifferent browsers using Selenium Grid (Part 2)

So this time we are gonna start up selenium server, but we are gonna start it up as a hub.
On my main computer (PC1), I' just gonna do the same command we done before "java -jar selenium-server-standalone-2.41.0.jar" and this time we are gonna use " -role hub" and this is gonna put this instance in hub mode.


Now there's a couple of other things we can do here. One is setting up a port, doing " -port <port_number>", that will change the port number. 
By default that's gonna be 4444. In case you have that in use you can change it. 
And you can also specify a configuration file, a JSON file in, as well a couple of other configuration options.

In most cases, this standard configuration works. So we just gonna keep things simple for now and use only "- role hub".


You can see it's lunching selenium grid server. You can tell that you are in grid mode, because it says "grid server" in this case. And you can see it's connected on port 4444.

Now once we have this up, we want to test to make sure this is actually running. So what we are gonna is open a browser and type this address "http://localhost:4444/grid/console".


And you can see it shows a page with "Grid Console", the version number and we can click "view config" to view the configuration here.

And this is the configuration for the hub, and we you'll see the details of the configuration. Some of those settings are pretty basic, like the port number, timeout. All this settings can be modified, but for the most cases the basic configuration is usually gonna work.

Now when we'll have nodes connected, we are gonna return to this console and we'll be able to see those nodes and manage those nodes. 

So, let's go ahead and create our first node.

Setting up the first node (PC1 - Windows 8)


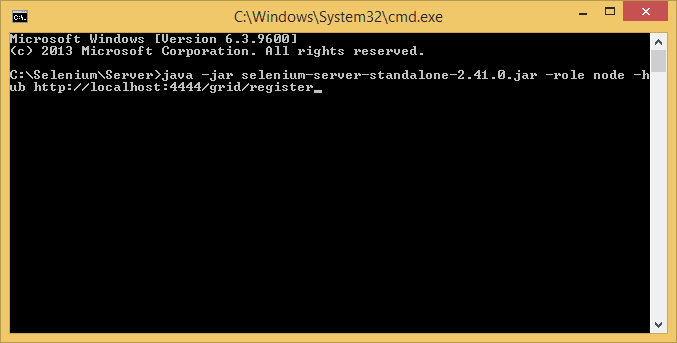
We just have to open another command prompt and type "java -jar selenium-server-standalone-2.41.0.jar" but this time we are gonna do " -role node" and then we are gonna do " - hub" and specify where our hub is " http://localhost:4444/grid/register". 


And again here, with the node we can specify some configuration, we can set a different port. 
The port by default it's gonna be "5555".

So let's go ahead and run this:


And you can see it's lunching selenium a selenium grid node, and it's actually configured from a JSON object, and will actually send that object to the server. You can see the configuration here. It's registering that node on the grid and it's constantly hitting the grid hub in order to get the status to figure out if it needs to run any test.

So if you look at the console now in "http://localhost:4444/grid/console".


You can see that we've got one Remote Proxy here, and we can see what ip address is listening on. And you can see it supports up to 5 concurrent tests and if you hover over one of the small icons you can see what the configuration is.


In this case the protocol is Selenium, platform is Windows 8, browser name is Firefox and then the max instances is 5.

And you can see we can call Google Chrome on here, 5 instances running at the same time. We can have Internet Explorer with 1 instance. You can also notice we have Remote Control (legacy), this is the old selenium (Selenium 1). So it allows you connect using Web Driver or through the old style selenium RC.

So that's our first node. Now we need to setup our second node.

Setting up the second node (PC2 - Ubunto Linux Virtual Machine)


In this second node, we'll be running a instance of Ubunto (Linux) operating system. To do that, we'll be using Virtual Box. The purpose of this post it's to guide how to setup a distributed testing environment using selenium grid. So we'll skip Ubunto setup and configuration of the virtual machine.

Once the virtual machine is setup with Ubunto and JRE, we go ahead and run a new node on it by running the same exactly process we did for creating the first node. By typing in a terminal windows "java -jar selenium-server-standalone-2.41.0.jar -role node -hub http://172.16.0.45:4444/grid/server".


Notice that the ip address changed because we are not using localhost anymore. Instead we are pointing our new node to the first machine (PC1) which is ip address is 172.16.0.45.


After launching we can see the second node is running in grid mode, same as node 1 in PC1.
And now we can go ahead and refresh our console in PC1 and we can notice we have a second Remote Proxy here. You can see what the address of that proxy is, and then it's on port 5555 running Linux OS.


Now, one thing to notice here also is that you need to make sure that your firewall settings are allowing selenium server to connect through the port here. 
So, for example, our hub (PC1) is on port 4444, on the PC2 I had to make sure I had allowed firewall out on PC2 and then in on the machine PC1 allowing connections coming from port 4444.
And if you don't do this, then you'll see it won't connect.

So next, I'm gonna set up an additional node on my Mac.

Setting up the third node (Mac - OS X 10.9.2 Mavericks)


After running the third node on my Mac, and I did exactly the same thing I did on PC2.

I just ran "java -jar selenium-server-standalone-2.41.0.jar -role node -hub http://172.16.0.45:4444/grid/server".
So let's go ahead and refresh this console again in PC1, and now you can see there's a third node there.


So now we are able to run remote test on a Mac as well.
We have just setup a basic configuration.

Next we'll see how to run some tests, just to verify their configuration works.

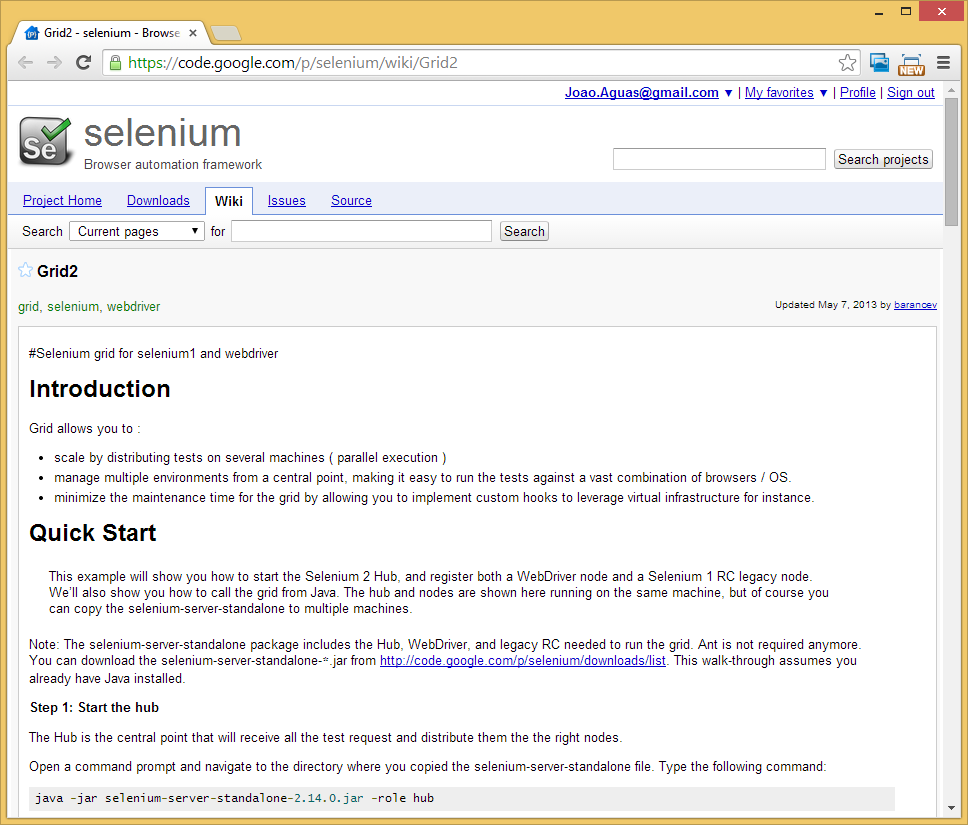
If you want to do a more advanced configuration, you can go to http://code.google.com/p/selenium/wiki/Grid2


This is basically the Google code page for selenium and inside the wiki there on grid, you can find here some more information. And you can find all the information we have covered, about how to start up selenium server as a node. But also what you'll find here, how to configure nodes by command lines and they give some instructions here how to do that. It tells you what the optional parameters are. And the basic things you might wanna change here are the things like the maxSession parameter, so how many tests can be running simultaneously and the browser type in parameters to maybe test different versions of a browser. You have actually the ability to chose the version number of the browser where you want to test. You just have to specify where that browser is. If you use one other than the current version.

-browser browserName=firefox,version=3.6,firefox_binary=/home/myhomedir/firefox36/firefox,maxInstances=3,platform=LINUX

Another thing you can see how to do here, is to configure your nodes by JSON. And you can do that on the node and hub. You can have some samples of configurations that might be useful.
It's a pretty good way to do the configuration.

So now let's run our first test in our grid to make sure everything is working.
Actually we don't need to make any changes in our test class, since the hub where the nodes are connected are in my local machine. 

var driver = new RemoteWebDriver(new Uri("http://localhost:4444/wd/hub"), DesiredCapabilities.Firefox());

Remember you can you different browsers, but you do have to set them up and configure them in which one of the nodes. So you'll have to setup Chrome or IE or whatever you want to use in that hub configuration.

If we look at our grid, we can see we've got three nodes here, and even dough it shows all of this browsers they are not necessarily all available. 


For example, on my Mac, I don't have Internet Explorer. But this is just the default. Remember you can change that configuration if you want to, in order to specify what browsers, how many are allowed and where the drivers are located.

If we'll run the tests it as it is, it would pick up a node that can run our tests according to the Desired Capabilities we selected. In this case Firefox. It picked up my local machine PC1 for that.

That was successful, but now let's do something to make sure that we get the Mac version.
What we can do here, is to change the Desirable Capabilities. 
So instead of just doing DesiredCapabilities.Firefox() and replace it to new DesiredCapabilities("firefox", "", new Platform(PlatformType.Mac)).

We will not specify the version of Firefox we want leaving the second argument as a empty string. We'll have:

var driver = new RemoteWebDriver(new Uri("http://localhost:4444/wd/hub"), new DesiredCapabilities("firefox", "", new Platform(PlatformType.Mac)));


So we can run this and watch the Mac executing the tests using Firefox.


Final Considerations


I would like to cover a one more point about selenium grid mode. 
That point is Parallel Execution. We didn't look at doing Parallel Execution, and that's it because it's really not part of Selenium or the grid framework itself. 
It's a little bit confusing to sum when you're expecting that if you use grid, that your tests will just automatically be executed in parallel. And that's not necessarily the case.

You have to do something to make that happen. So, for example, let's say that we wanted to run 10 test cases at a time, and maybe you have a 1000 test cases or so. You would need to, in the way that you run your tests, set up parallel execution. In your test project, perhaps you would spin off threads running your tests and they will all hitting the same hub. And that hub can execute them in parallel. 
But doing that, we are actually controlling the parallelization of our tests at the level where we are running them or where the driver of the test is. 
But basically you are responsible for parallel executing. The grid makes it possible, but you have to initiate it.

Wednesday, May 14, 2014

Testing your web application in parallel with multiple machines against different browsers using Selenium Grid

Selenium-Grid allows you run your tests on different machines against different browsers in parallel. That is, running multiple tests at the same time against different machines running different browsers and operating systems. Essentially, Selenium-Grid support distributed test execution. It allows for running your tests in a distributed test execution environment.

Architecture:


Setting up Selenium Grid:


Selenium Server is actually a java program, because it was originally build for java in java. So we will need to have JRE (Java Runtime Environment) installed.

If you don't have that installed already, you can go to http://www.java.com/getjava, and you can download java.

Once you have that installed, we can go to http://seleniumhq.org/download


Here we are gonna grab the latest version of selenium server.

You can see it's a jar file. You can copy it to a location where you can use it and run it.
In this example, I will copy it to "C:\Selenium\Server".


Before you can run this, you do need to have java in your path environment variables.

You may already done this, but  if you haven't you can go into your Control Panel under System, then you want to go to Advanced System Settings.

Under here, you wanna go to Environment Variables... and set up your path here by editing the PATH Variable in System variables and adding to Variable value the path to you java bin folder. In my case "C:\Program Files\Java\jre8\bin".


This maybe be a different install location for you depending on what version of Java you've installed. But basically you just have to get to this bin directory.


Once you have done that, go ahead to the directory where you dropped selenium server JAR file using a command prompt window.


On this command prompt, type "java" to make sure you can access java.

Then type "java -jar selenium-server-standalone-2.41.0.jar"

You can also do " -port <port_number>" to specify the port number you want.


And you can see it's launching selenium server as a standalone server.


What it's doing here. It's creating a simple web server that's gonna listen on a port.

You can see that it says "RemoteWebDriver instances should connect to: http://127.0.0.1:4444/wd/hub".

And so now, if we point a Remote Web Driver in our test at this address it will communicate with this server in order to execute the test.


This is all we need to do to get server running, and we need to leave this open because server is running in this process.


So now, while writing the different test scenarios, instead of using your local drivers:


var driver = new ChromeDriver(@"C:\Drivers")


We are gonna change this and  use what is called a "Remote Web Driver":


var driver = new RemoteWebDriver(new Uri("http://localhost:4444/wd/hub"), DesiredCapabilities.Firefox());


Here we are gonna specify two things:


  1. The address of our remote selenium server (new Uri("http://localhost:4444/wd/hub")
  2. The capabilities we want (DesiredCapabilities.Firefox())

We can put here some specific desired capabilities. We can say we want to run Chrome Web Browser and specify the version number and the operating system. And if the server was able to fulfil that, it would try to run what we are requesting.

In this case we are choosing a basic one (DesiredCapabilities.Firefox()), and this is just going to tell the remote selenium server to run our test in Firefox.

We can use other browsers besides Firefox when we run selenium server.
Remember that we ran the command "java -jar selenium-server-standalone-2.41.0.jar", we also have to specify an option that would say where that driver is.

For example for Chrome, we would have to specify where that chrome driver is, just like we had to do here "var driver = new ChromeDriver(@"C:\Drivers")", when we tried to use ChromeDriver locally. Because Chrome Driver doesn't come built in Selenium.

You can run your tests now, and you can see in selenium server command window that it's executing a new session for selenium server, and that Firefox loaded up and it ran your tests.

So that's really all you have to do to get a hub configured.

The next step is to setting up the grid.


We can also setup selenium server in "The Grid Mode". And it's gonna be very similar to what we have done so far. You can see the diagram, that's what we are gonna do here.

I'm gonna set up a Hub and a Node running on my main PC with Windows. 
On virtual machine, I'm gonna run my second PC with Linux and set up another Node.
And then I'm gonna run a third Node on a Mac.

And so on, what we see here is that each one of this nodes it's just gonna be a separate instance of selenium server and we are just gonna specify what role it's playing. 

So for the Hub, we will just specify it's in the "Hub Mode". And then for the Nodes we are gonna specify that they're in the "Node Mode" and then we are gonna tell them where to connect to the Hub.

And by doing that, we'll have all this nodes connected to the hub and we can actually see that the nodes are connected to the hub.

The purpose of doing this is two-fold:
  • It allows you to distribute your tests so that you can run them in parallel. All through the same coordinator which is the Hub.
  • Allows you to run in different platforms and different configurations and have the hub be smart enough to figure out what node it's connected and which node to use based on what kind of requirement you have for running your test.